Choosing the right Wood Cutting Board Set is not only about attractive grain or a polished kitchen photograph. It is about daily performance. A board should feel stable beneath a chef’s knife, resist deep cuts, and dry without developing a sour smell. This guide presents 10 practical tips for comparing wood species, board size, thickness, edge design, maintenance needs, and overall value.
Experienced woodworkers often stress simple, repeated care. As woodworking educator Peter Korn once noted, “Good tools reward attention, but they also reveal neglect.” That principle applies here. A beautiful walnut board may perform wonderfully, yet it can suffer when left wet beside a sink. A lighter acacia set may offer useful variety, but inconsistent construction can create movement or warping. Details matter.
Look closely.
During my own kitchen testing, small differences became obvious. One board slid while slicing a firm squash. Another felt secure but was too heavy to lift comfortably. A third had several sizes, though none worked well for large meal preparation. These imperfect findings are worth considering, because product descriptions rarely show every inconvenience. The best set should match your counter space, cooking habits, cleaning routine, and tolerance for maintenance. It should also come from a transparent manufacturer that explains the wood source, finish, care instructions, and warranty. The following tips will help you assess those details calmly, avoid attractive but impractical choices, and select a set that remains dependable through years of chopping, serving, and careful drying.
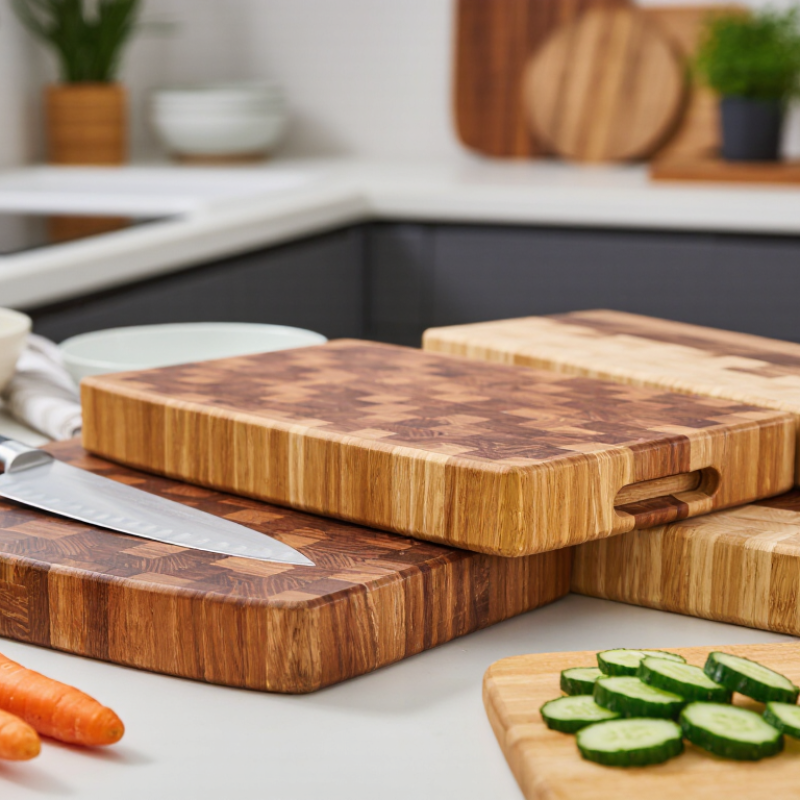
Before choosing a wood cutting board set, study how your kitchen actually works.
A home cook who prepares small breakfasts may need one compact board. Someone who dices vegetables, slices bread, and handles raw meat needs more separation. Food-safety practice supports using different boards for ready-to-eat foods and raw proteins. This reduces cross-contamination during busy meal preparation. Choose a board with enough space for your largest knife. Crowded chopping feels unstable and encourages rushed cuts.
Your counter space and cleaning habits matter too. Measure the storage area before buying several boards. A thick board may protect your counter, but it can become heavy to lift.
I once bought an oversized board because it looked professional. It barely fit beside the sink. That mistake changed my buying habits.
Now I prefer one large daily board, one smaller produce board, and a slim board for bread. Consider handles only if you have a safe storage position. A hanging board can dry well, but it may collect grease near the stove.
Inspect the wood surface for smooth finishing, tight joints, and secure edges.
Avoid boards with deep cracks or rough splinters. After use, scrape away food, wash the surface by hand, and dry it upright. Never leave it soaking. Apply food-safe mineral oil when the wood looks pale or feels dry.
Still, I sometimes forget this step. A realistic care routine is better than an ideal routine you will not follow.
Choosing a wood cutting board set starts with the wood itself. Maple offers a fine, closed grain and a firm cutting surface. Walnut feels softer and shows darker, richer patterns. Acacia often brings striking color variation, but its hardness can differ between boards. Bamboo is light and durable, though its glued layers may feel less forgiving under a sharp knife. I have found that “harder” does not always mean better; comfort matters during long prep sessions.
Tips: Check the grain pattern before buying. Edge-grain boards usually balance durability and price. End-grain boards can absorb knife impact more gently, but they need careful maintenance. Avoid boards with deep cracks, loose joints, or rough edges. These flaws collect moisture and food particles. Compare thickness, too. A heavier board stays steadier while chopping. Small boards work well for fruit, while larger ones provide safer space for vegetables and meat preparation.
Cutting performance depends on more than wood type. A smooth, well-finished surface should let the blade glide without dragging. I once selected a beautiful board with a glossy finish, but it became slippery when wet. That mistake changed how I judge appearance. Look for stable feet or enough weight, and test the board’s balance if possible. After use, wash it by hand, dry it upright, and apply food-safe board oil when the surface looks pale. Do not ignore small stains. They may be harmless, but they can reveal poor drying habits.
Comparing wood types, grain patterns, and cutting performance
Janka hardness indicates how resistant each wood species is to indentation. Hard maple and beech provide strong durability while remaining suitable for regular kitchen cutting. Walnut and cherry are softer, which can feel gentler on knife edges but may show surface marks more easily.
For a cutting board set, compare hardness with grain construction: end-grain boards generally absorb knife impact better, edge-grain boards offer a balance of durability and price, and face-grain boards provide a smooth, attractive surface for lighter use. Choose food-safe finishes, stable construction, and practical board sizes for different tasks.
A wood cutting board set should match your real cooking habits, not just your countertop. Measure your available space before choosing a board. A large board gives vegetables room to spread, while a compact board suits quick tasks. Keep separate boards for raw meat and ready-to-eat foods. Size matters.
Check the board’s thickness carefully. Boards around one inch thick usually resist bending better than thin models. Thicker wood also feels steadier during heavy chopping. However, excessive thickness adds weight and makes cleaning less convenient. I once chose the heaviest board available. It felt stable, but I stopped using it because lifting it became annoying. A practical board should be sturdy, not exhausting.
Test stability on a flat surface. Press each corner gently and watch for rocking. Rubber feet can help, but they may reduce flexibility during storage. A stable board should stay still without constant adjustment. Consider weight, too. A heavy board can absorb chopping force, while a lighter one is easier to move and wash. Look for smooth edges and an even surface. Small gaps may trap moisture and food particles. I also check whether the board sits flat after hand washing, since wood can change shape as it dries. My own testing is not perfect, and different kitchens may produce different results. That is worth remembering.
A good wood cutting board set should offer more than several attractive sizes. Check whether it includes a large board for daily chopping, a smaller board for fruit, and a separate surface for raw meat. Look underneath, too. Non-slip feet can improve control, but they may trap moisture. I prefer boards with stable construction, smooth edges, and enough thickness to resist warping. A juice groove is useful for tomatoes or roast meat, although it can make cleaning more demanding.
Maintenance needs should match your routine. Wash wooden boards by hand with warm water and mild detergent, then dry them upright immediately. Never leave one soaking in the sink. Apply a food-safe conditioning oil when the surface looks pale or feels rough. Read the care instructions carefully, because some finishes require different products. I once ignored a small split near the edge, and it widened after repeated washing. That was avoidable.
Food safety depends on habits, not just materials. Use separate boards for raw meat and ready-to-eat foods, or sanitize them properly between tasks. Replace any board with deep grooves, persistent odors, mold, or cracks that cannot be cleaned. A smooth surface is easier to inspect. Harder wood may resist marks, but no board is automatically hygienic. Dry storage matters as well; stacking damp boards can create a hidden problem. I still find this easy to overlook during busy meal preparation.
Choosing a wood cutting board set starts with craftsmanship, not appearance. In my kitchen, I check whether each board lies flat on the counter. A rocking board feels unsafe and usually worsens over time. Look closely at the grain, corners, and joints. Tight, even joints suggest careful construction. End-grain surfaces often resist deep knife marks, while edge-grain boards can offer better value. Thickness matters too; boards under three-quarters of an inch may warp more easily.
Examine the finish with your fingertips. It should feel smooth, never waxy, sticky, or strongly scented. Confirm that the surface uses a food-safe finish. A useful set should include different sizes. A small board handles fruit, while a larger one gives vegetables enough working space. However, more pieces do not always mean better value. I once bought a set with attractive extras that stayed unused in a drawer. Measure your storage area before choosing.
Long-term durability depends on care as much as construction. Wash boards by hand, dry them upright, and never leave them soaking. Apply board conditioner when the wood looks pale or feels rough. Hard woods usually tolerate daily chopping better, but they still need maintenance. Check for hairline cracks, raised edges, or persistent odors before buying. A clear care guide and responsive seller add practical value. I still forget oiling sometimes, and that mistake has taught me to treat maintenance as part of the purchase.
| No. | Selection Tip | What to Assess | Practical Benchmark | Value and Durability Benefit |
|---|---|---|---|---|
| 1 | Choose a suitable wood species | Look for dense, closed-grain hardwoods with good resistance to knife marks and moisture. | Hardwoods such as maple, walnut, cherry, beech, or teak are commonly suitable for food preparation. | Dense hardwood generally lasts longer and develops fewer deep grooves than softwood. |
| 2 | Compare edge-grain and end-grain construction | Check the direction of the wood fibers and the quality of the glue joints. | End-grain boards usually offer greater knife resistance; edge-grain boards are often lighter and more affordable. | The construction style helps determine cutting comfort, repairability, weight, and purchase value. |
| 3 | Verify food-safe finishing | Review the finish description and avoid coatings that can flake, peel, or leave a strong chemical odor. | A smooth surface treated with food-grade mineral oil or a suitable board wax is a practical choice. | A proper finish reduces water absorption and helps limit drying, staining, and surface cracking. |
| 4 | Inspect thickness and stability | Check whether the board feels rigid and remains flat when placed on a level counter. | A main board around 25–40 mm thick is typically more stable than a very thin board. | Adequate thickness helps resist warping and improves control during chopping. |
| 5 | Select useful board sizes | Consider available counter space, food quantity, storage, and whether the set includes more than one size. | A versatile set may include a small board for fruit, a medium board for daily prep, and a larger board for meat or batch cooking. | Multiple practical sizes reduce cross-use and make the set more useful over time. |
| 6 | Check surface smoothness | Run a clean hand lightly over the surface and inspect for splinters, rough patches, open joints, or excessive tool marks. | The cutting surface should feel consistently smooth without sharp edges or loose wood fibers. | Quality sanding improves comfort, sanitation, and resistance to food particles collecting in grooves. |
| 7 | Look for secure non-slip features | Assess feet, rubber grips, or the board’s natural stability without compromising its usable cutting area. | The board should remain steady on a clean, dry countertop during ordinary chopping. | Better stability improves safety and reduces uneven wear caused by sliding or rocking. |
| 8 | Evaluate moisture management | Check whether the design includes a juice groove and whether the board can dry completely after washing. | A groove is helpful for juicy foods, while open airflow around the board supports drying. | Managing moisture helps reduce swelling, odors, bacterial growth, and long-term warping. |
| 9 | Calculate total value, not only price | Compare wood quality, dimensions, construction, included accessories, care requirements, and expected service life. | A higher initial price can be reasonable when the board is thicker, well-finished, repairable, and used frequently. | Cost per year of use is often more meaningful than the lowest purchase price. |
| 10 | Confirm care and maintenance requirements | Make sure the set can be hand-washed, dried upright, and periodically re-oiled as recommended. | Avoid routine dishwasher use unless the manufacturer specifically states that the product is dishwasher-safe. | Consistent care prevents excessive moisture damage and extends the board’s usable life. |